Configure GitLab for Plane integration Pro
This guide walks you through setting up a GitLab application to enable GitLab integration for your Plane workspace on a self-hosted instance. Since self-hosted environments don’t come pre-configured for GitLab, you’ll need to create an application, configure authentication, and set the necessary permissions to ensure seamless integration.
This guide covers configuration for both:
GitLab.com The standard cloud-hosted GitLab service
GitLab Self-managed Self-hosted GitLab instances for organizations with specific compliance or security requirements
In this guide, you’ll:
WARNING
Activate GitLab integration
After creating and configuring the GitLab application and configuring the instance as detailed on this page, you'll need to setup the GitLab integration within Plane.
Create GitLab Application
On the left sidebar in GitLab, select your avatar.
Select Preferences tab.
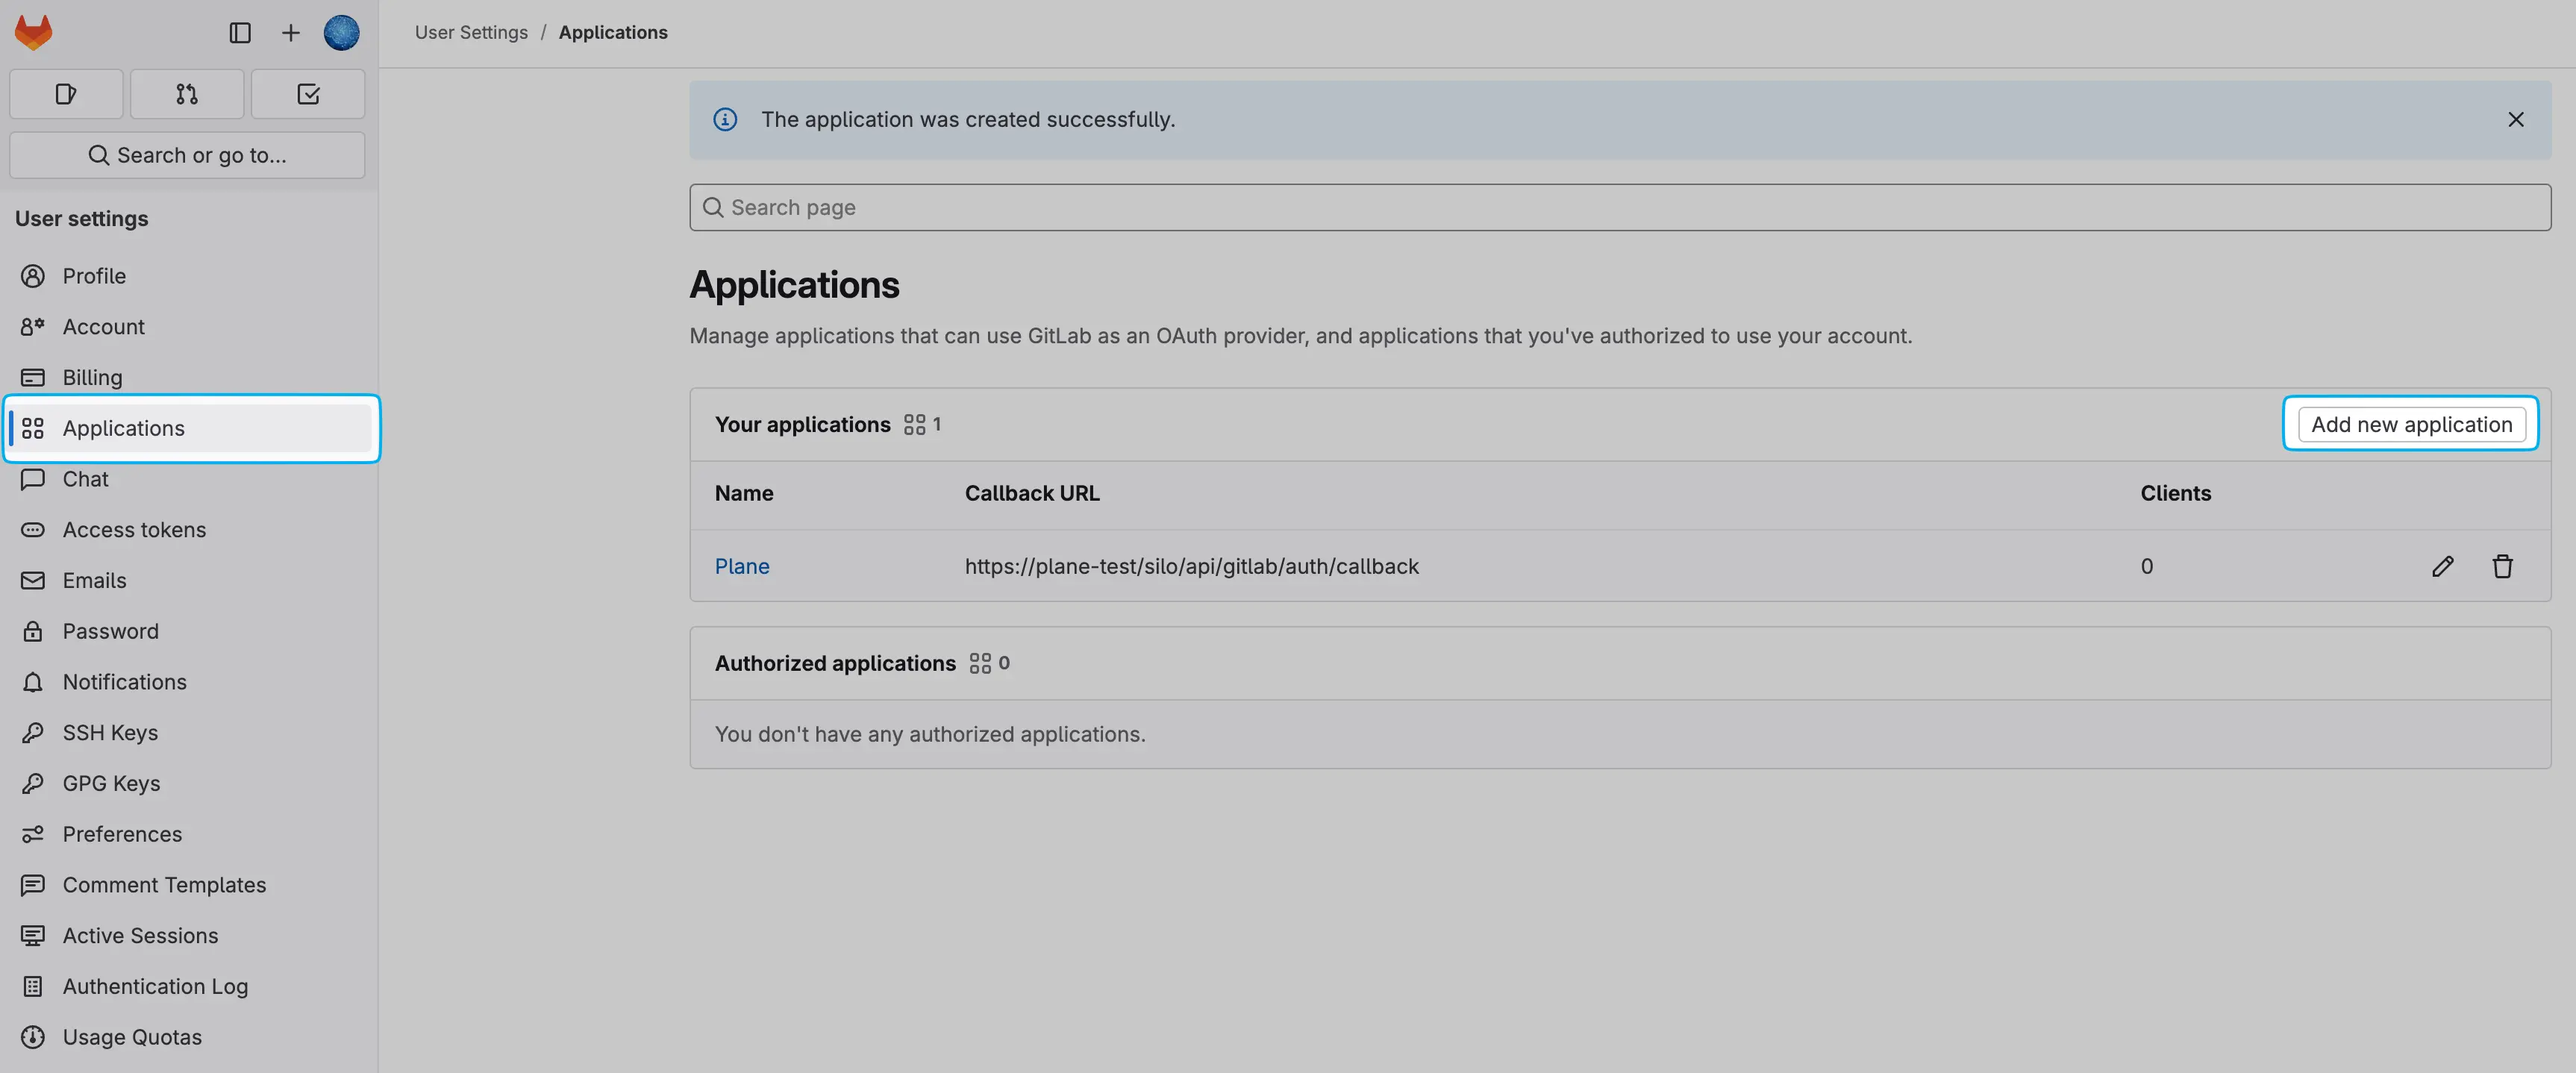
Navigate to the Applications tab.
Click on Add new application to begin the setup.

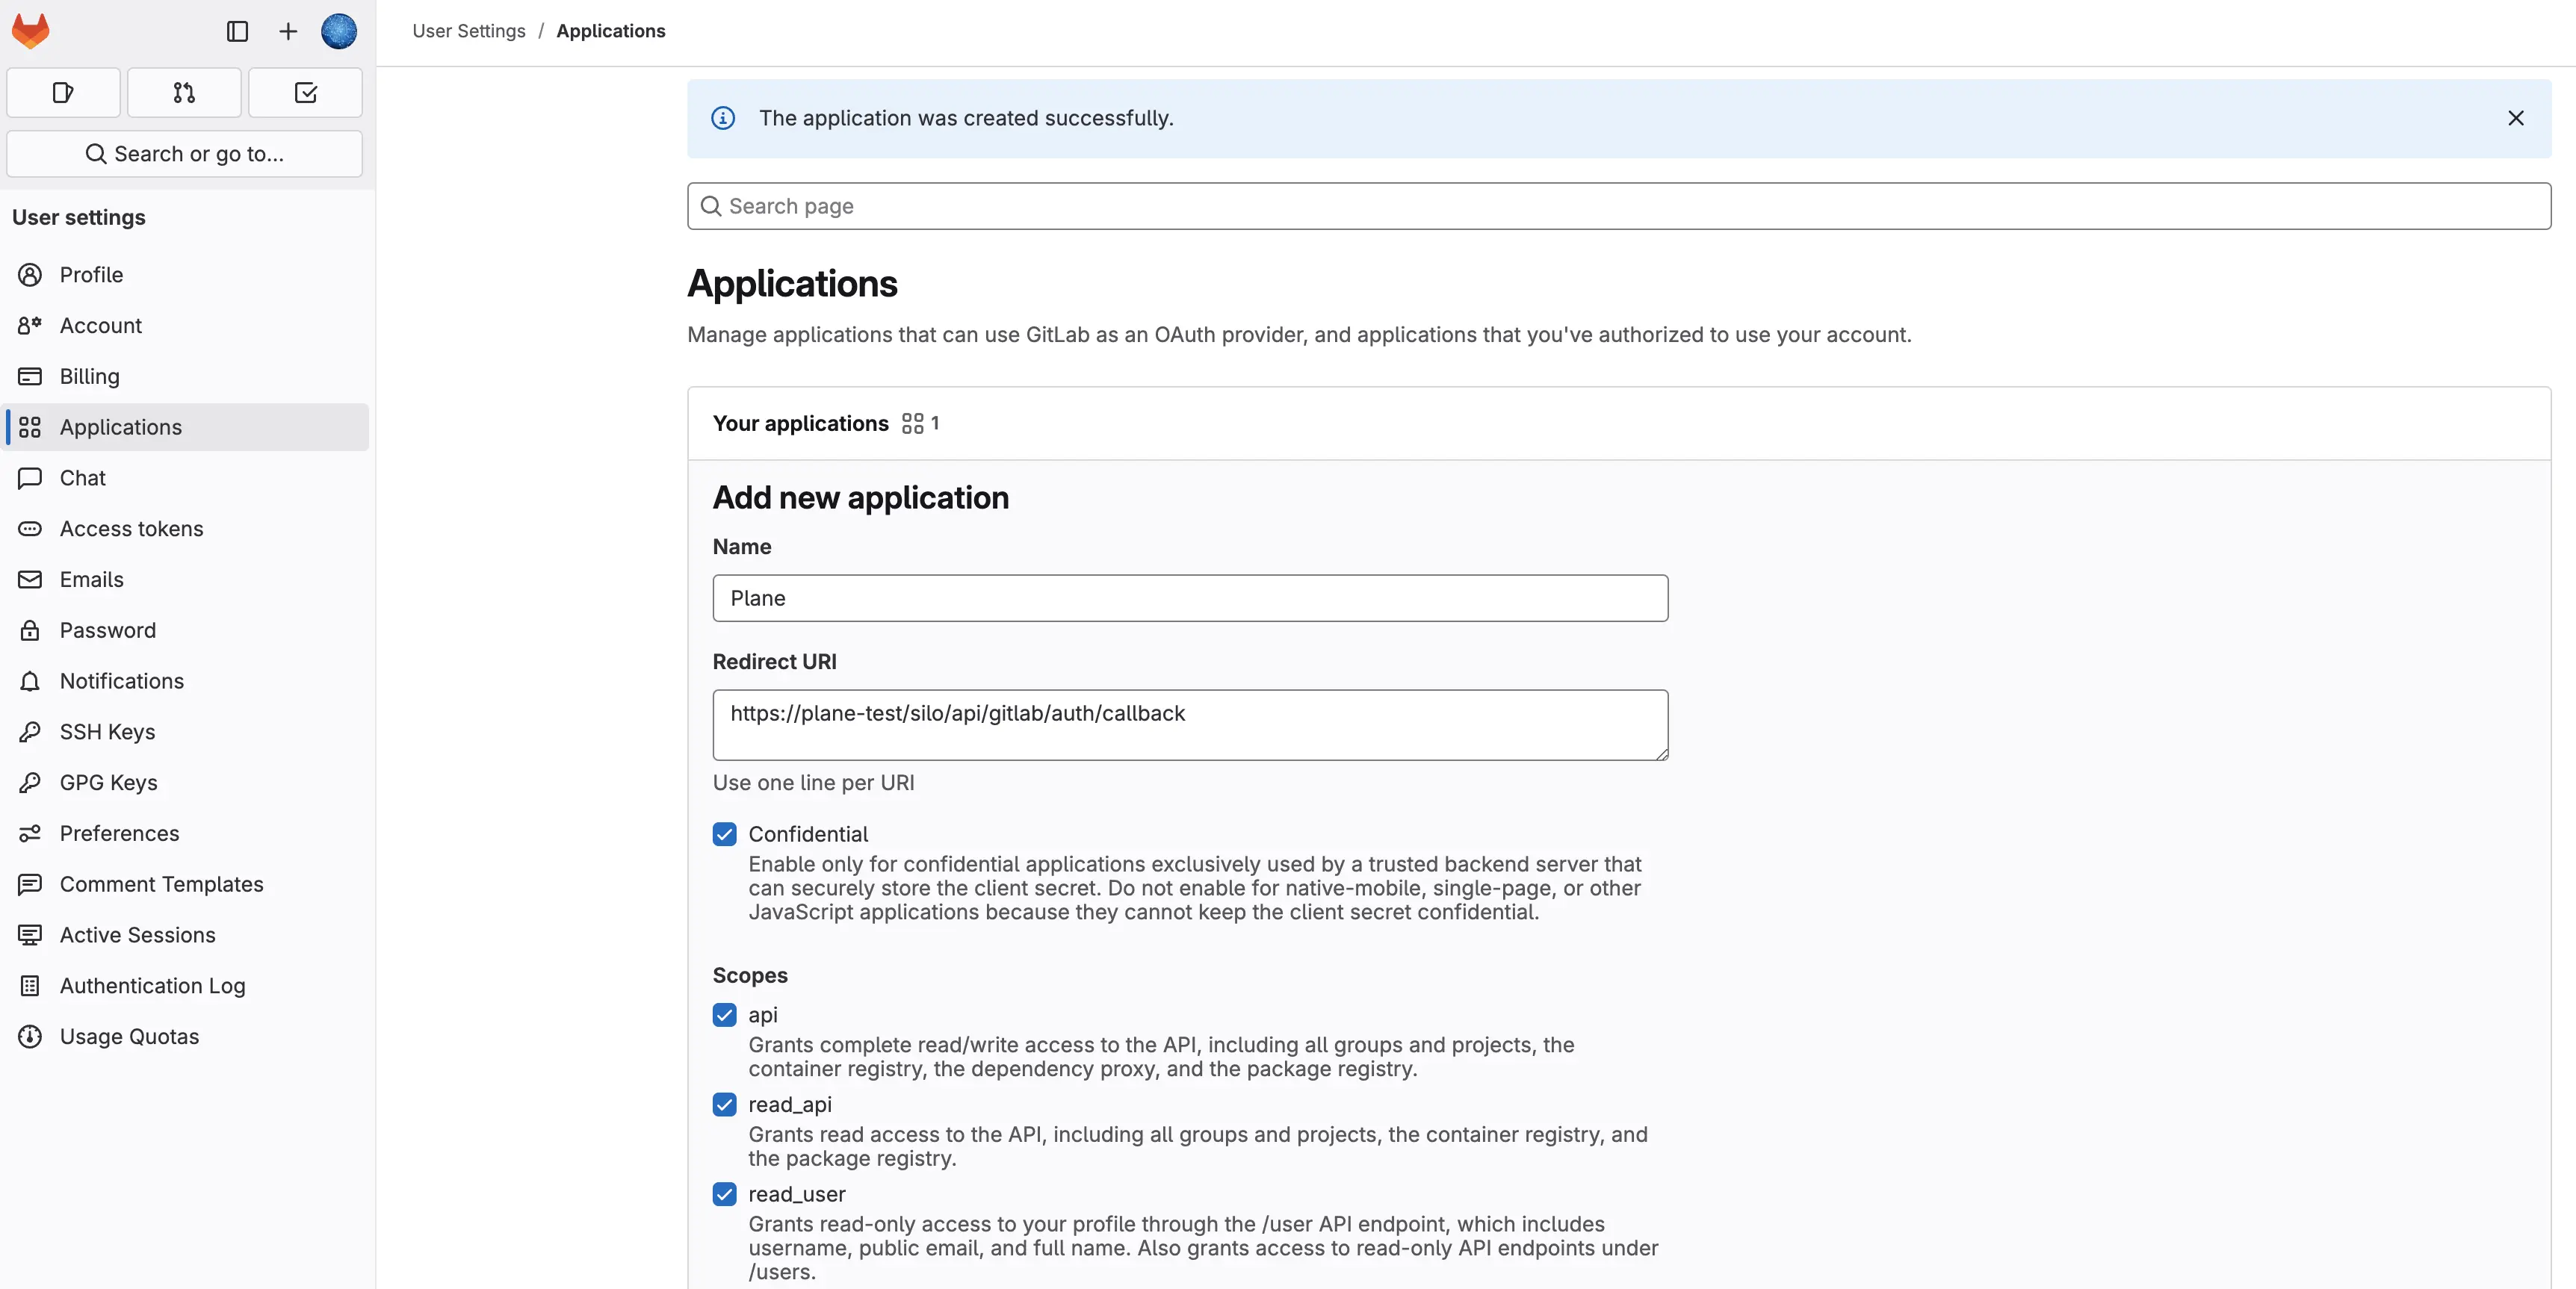
Provide a Name for your application.
Enter the following Redirect URI, replacing [YOUR_DOMAIN] with your actual domain:
bashhttps://[YOUR_DOMAIN]/silo/api/gitlab/auth/callbackCheck the Confidential box.

Set permissions by selecting the required Scopes. The table below explains each scope:
Permission Explanation apiGrants full read/write access to the API, including all groups, projects, container registry, dependency proxy, and package registry. Required for API requests. read_apiAllows read-only access to all groups, projects, container registry, and package registry. read_userGrants read-only access to user profiles via the /user API endpoint, including username, public email, and full name. Also provides access to /users endpoints. read_repositoryEnables read-only access to repositories in private projects via Git-over-HTTP or the Repository Files API. profileGrants read-only access to the user's profile data using OpenID Connect. emailProvides read-only access to the user's primary email address using OpenID Connect. Click Save Application to finalize the setup.
Configure Plane instance
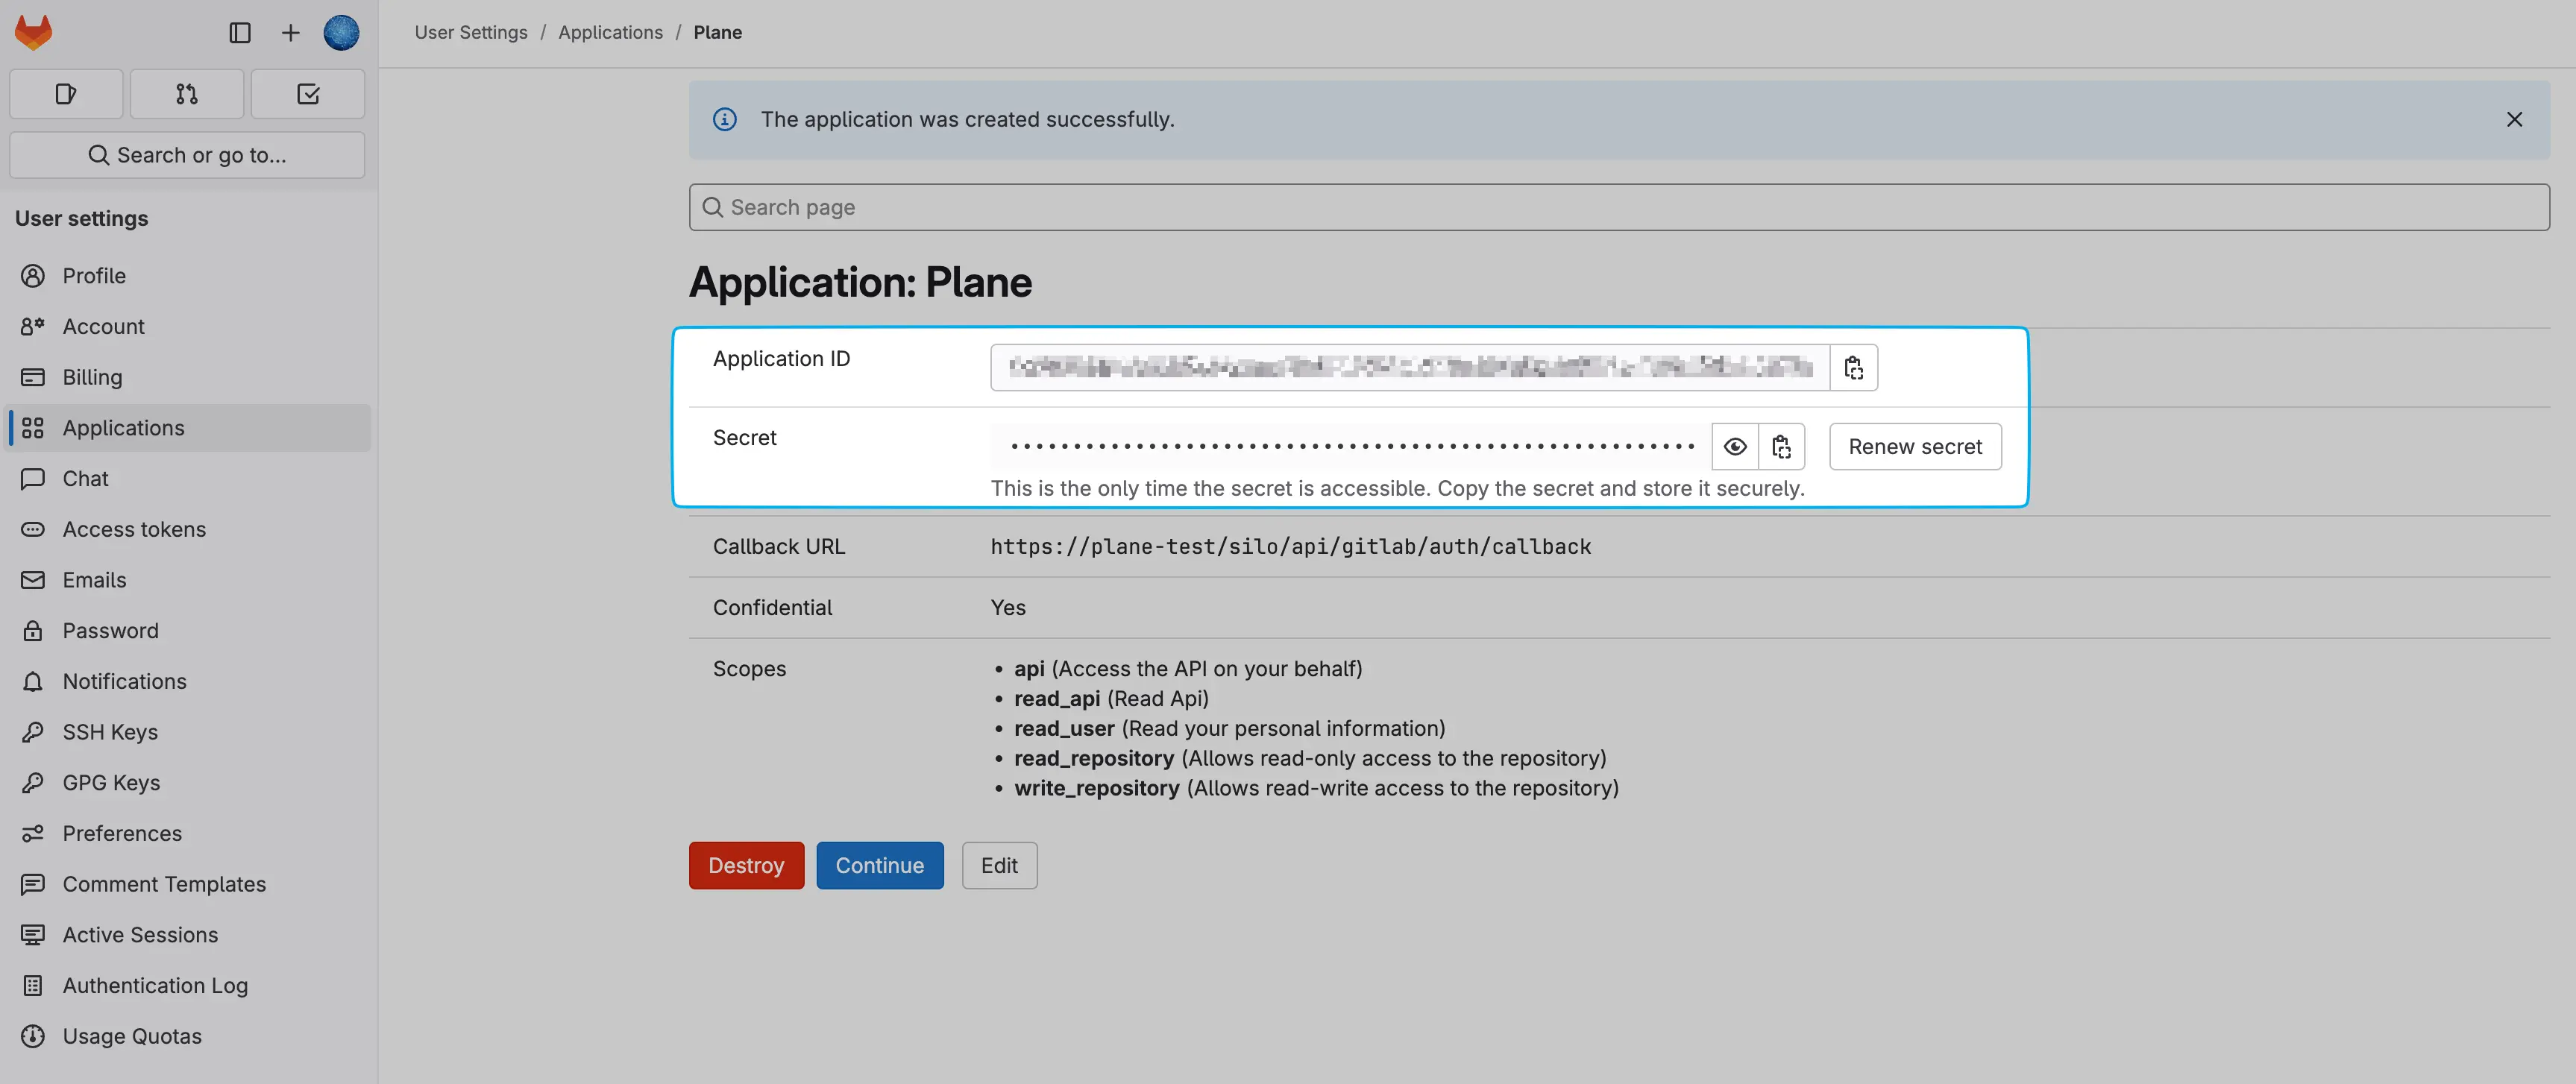
Copy the Application ID and Secret from the newly created application.

Add these environment variables with the values to your Plane instance's
.envfile.bashGITLAB_CLIENT_ID=<application_id> GITLAB_CLIENT_SECRET=<secret>Save the file and restart the instance.
Once you've completed the instance configuration, activate the GitLab integration in Plane.

